
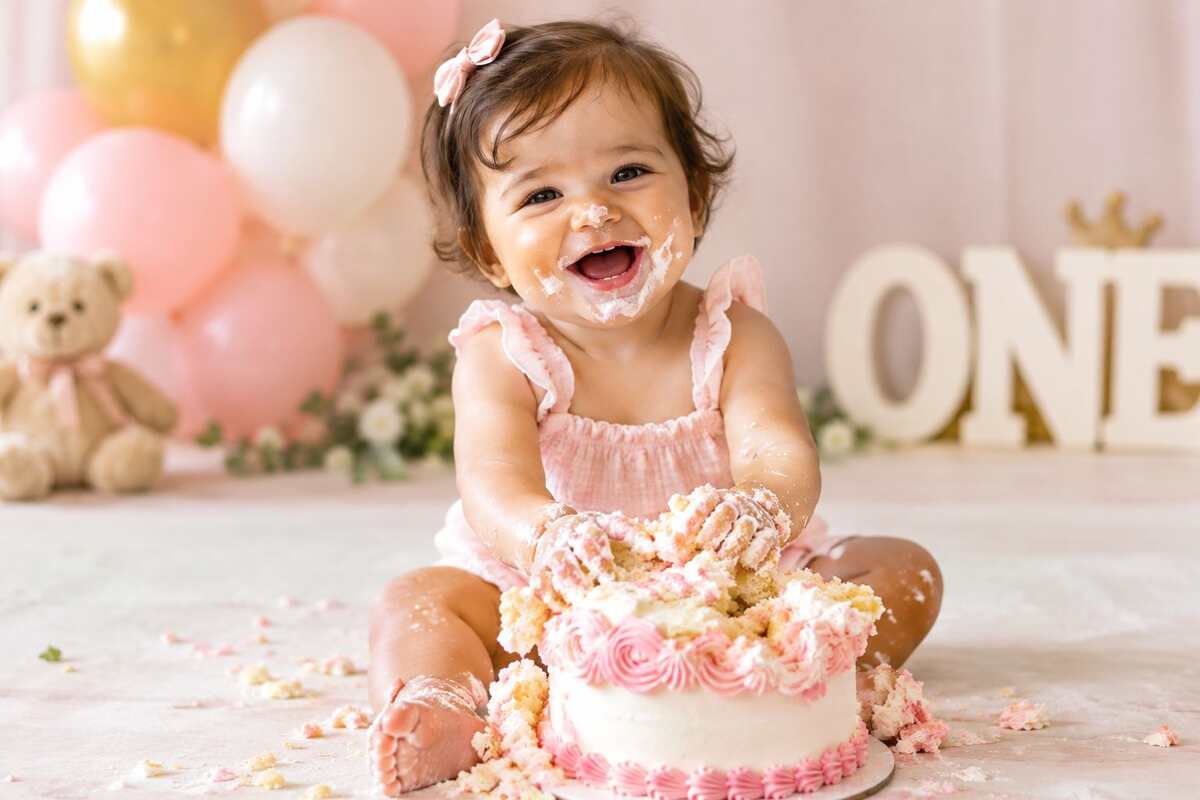
A baby’s first taste of birthday cake, hands and all, is one of those moments parents want captured forever. That’s exactly what a photo smash the cake session is designed to do. If you’re planning one for your little one, this guide covers everything you need: timing, cake choice, outfits, props, posing, and whether to DIY it or hire a photographer.
What Is a Photo Smash the Cake Session?
A cake smash photoshoot is a photography session, usually held around a baby’s first birthday, where the baby is given their own small cake to explore and dig into while a photographer captures the reaction.
Unlike a typical birthday photo, this session isn’t posed. It’s meant to be spontaneous. Some babies dive straight in, some poke at the cake cautiously, and others aren’t interested at all. All of these reactions make for genuine, memorable photos.
For most parents, these images become some of the most treasured photos from their child’s first year.
Best Time to Schedule Your Baby’s Cake Smash
Timing affects the mood of the whole session more than people expect.
- Book the shoot right after a nap, when your baby is rested and alert.
- Avoid scheduling around mealtime. A slightly hungry baby tends to explore the cake more eagerly, but an overly hungry one gets fussy fast.
- Morning sessions usually work best, since most babies are more cheerful earlier in the day.
- Try to schedule it close to the actual birthday. A few days before or after is fine, and some parents do it a week early to have prints ready for the party.
Choosing the Right Cake for a Smash Photoshoot
The cake doesn’t need to be elaborate, just practical and photogenic.
Size: A 4 to 6 inch cake is enough. Babies rarely eat much, and a smaller cake is easier to manage and clean up.
Ingredients: Since this is often a baby’s first cake, many parents choose a version made without refined sugar. In fact, the AAP recommends avoiding added sugar entirely for children under 2, so ingredients like mashed banana, yogurt, or oat flour work well as natural sweeteners. Check with your pediatrician if allergies are a concern.
Color: Bright colors like pink, blue, or rainbow layers photograph well. Dark colors such as black or deep purple tend to look messy rather than fun and can stain skin more visibly.
Texture: Soft buttercream frosting smashes and smears easily. Fondant tends to stay intact, which works against the whole point of the shoot.
How to Pick the Perfect Backdrop and Setup
The backdrop sets the tone of the photos, and it doesn’t need to be expensive.
Popular options include:
- Solid color paper or fabric backdrops that keep attention on the baby
- Balloon garlands for a festive feel
- Themed setups like a boho arch, rainbow arrangement, or a simple “ONE” banner
- Neutral tones like beige or pastel for a timeless look
A few setup tips that make cleanup easier:
- Lay a plastic sheet or old blanket under the setup before starting
- Position near natural light for softer, more flattering photos
- Keep the area free of clutter so the focus stays on the baby and cake
What to Dress Your Baby in for the Big Smash
The right outfit keeps your baby comfortable while looking good on camera.
Good options:
- A diaper with a bow, suspenders, or a bowtie
- A soft, stretchy romper in a solid color
- A tutu or skirt paired with a plain onesie
What to avoid:
- Tight or restrictive clothing that limits movement
- Busy patterns that clash with the backdrop
- New fabrics your baby hasn’t worn before, in case of skin sensitivity
Bring a backup outfit and keep wipes nearby for a quick cleanup after the shoot.
Must-Have Props for a Memorable Smash Session
Props add character without overwhelming the scene.
- A “ONE” sign or balloon to mark the milestone
- A milestone blanket with the baby’s name and birthdate
- A small toy nearby to encourage smiles
- A crown, headband, or bowtie matching the outfit
Two or three well-placed props usually work better than a crowded setup competing with the baby for attention.
Photo Smash the Cake Tips for Stress-Free Cleanup
Cleanup is the part most parents worry about, but a little prep makes it manageable.
- Protect the floor with a plastic drop cloth or old bedsheet
- Keep a bucket of warm water and washcloths within reach
- Plan a bath immediately after the shoot
- Use washable or disposable backdrops, since frosting tends to spread
- Cover nearby furniture that could get frosting on it
A bit of preparation means you can enjoy the moment instead of worrying about the mess.
Posing Ideas to Capture Every Fun Moment
The best cake smash photos are usually candid rather than posed. Still, a general shot list helps.
- The “before” shot, with the baby sitting calmly next to the untouched cake
- The first touch or curious moment
- The full smash, with hands and face covered in frosting
- Close-ups of frosting-covered fingers and toes
- A candid laugh or surprised expression, often the favorite shot of the set
Take more photos than you think you need. Babies move quickly, and the best expressions often happen in short bursts.
Common Mistakes to Avoid During the Shoot
A few missteps can turn an easy session into a frustrating one.
- Scheduling too close to nap time or a feeding
- Choosing a cake that’s too large, adding mess without improving the photos
- Overcrowding the scene with too many props
- Rushing the session. Give it at least 20 to 30 minutes so the baby can warm up
- Not having a backup plan if the baby hesitates at first
If your baby cries or resists, pause, offer comfort, and try again after a short break.
DIY vs Hiring a Professional Photographer
Both approaches work well. The right choice depends on budget and how much control you want over the shoot.
DIY works well if:
- You already have a decent camera or smartphone with good lighting
- You’re comfortable directing the shoot yourself
- You want a simple, low-cost setup
Hiring a professional makes sense if:
- You want polished, edited, print-ready images
- You’d rather focus on your baby than manage a camera
- You want more variety in angles, lighting, and posing
Many photographers offer cake smash packages that include backdrop, props, and editing, which can be more convenient than assembling everything yourself.
FAQs
What age is best for a cake smash photoshoot?
Most parents schedule it around the first birthday, typically between 10 and 13 months, once the baby can sit up independently.
Is it safe for babies to eat cake at their first birthday?
Yes, in small amounts. Many parents choose a sugar-free or allergy-friendly smash cake. Check with your pediatrician if you have concerns.
How long does a cake smash session take?
Most sessions last 20 to 45 minutes, including setup, the smash itself, and a quick cleanup afterward.
What if my baby doesn’t want to touch the cake?
This is common. Offer a small taste first, use a favorite toy to spark curiosity, or simply capture the candid reaction. Hesitant expressions often make charming photos too.
Do I need a professional photographer for a cake smash?
No. A DIY setup with good lighting and a smartphone can work well. A professional typically delivers more polished, print-ready results.
Conclusion
Planning a photo smash the cake session comes down to a few practical steps: choose the right timing, pick a cake and outfit that photograph well, keep the setup simple, and prepare for cleanup ahead of time. Whether you handle it yourself or hire a photographer, the goal stays the same, capturing your baby’s genuine first reaction to cake.
These photos end up being more than just birthday keepsakes. They become part of the story you tell every year after, so relax, let the mess happen, and enjoy the moment.